If you've built a great new website and now want to know how to share it with others or simply use it as a basis for another new site, then this article is for you.
The Umbraco package utility allows you to bundle up a complete website or a single component into what's called a package. This consists of all the files the system will need to recreate the original site / component at the other end, plus an XML file that describes where all these files should go, plus definitions for document types, page content and everything else the system will need. This is then all wrapped up in an easy to distribute zip file called a Package.
The rest of this article explains, step by step, how you can do this for yourself.
Step 1 - Create a new package
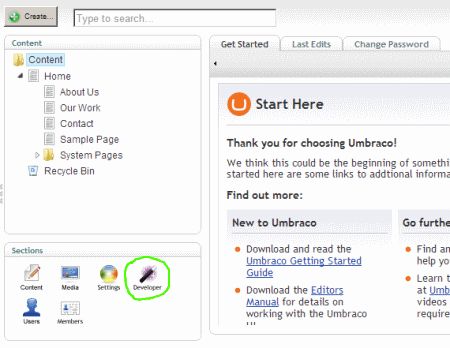
Open up the Umbraco site builder for the site you wish to package and select the developer section (circled in green).
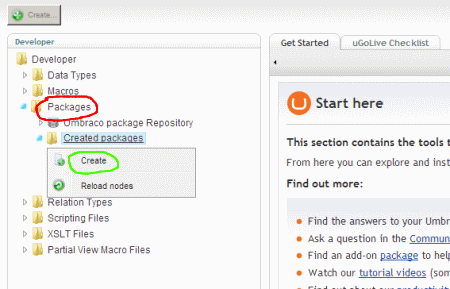
Expand the packages option (circled in red) and then right click your mouse over 'created packages' (circled in green) to start the create a package process.
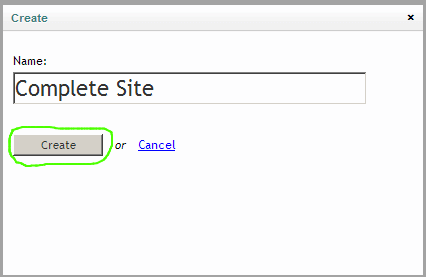
Give the package a name that makes sense (I called my one 'Complete site' for this tutorial) and then press 'Create' (circled in green).
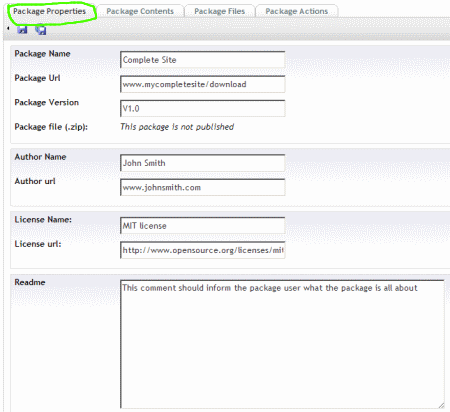
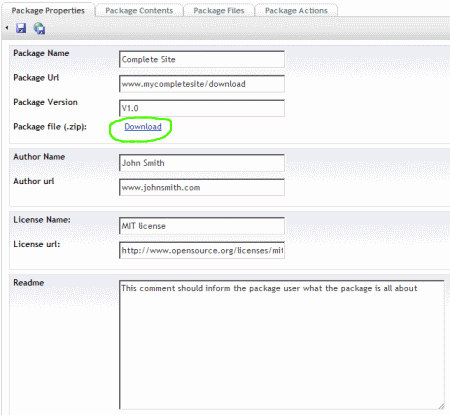
Step 2 - Enter Package Properties
Click on the newly created package (circled in red) and a page with four tabs will appear in the right hand window.
Select the 'Package Properties' tab and then fill in the fields shown on that tab (circled in blue).
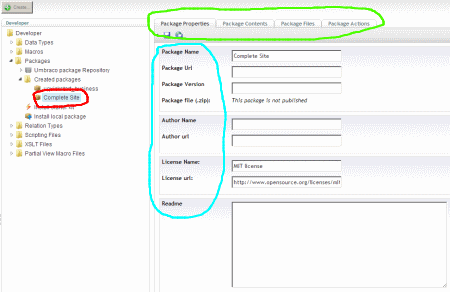
Below is an example of a completed form.
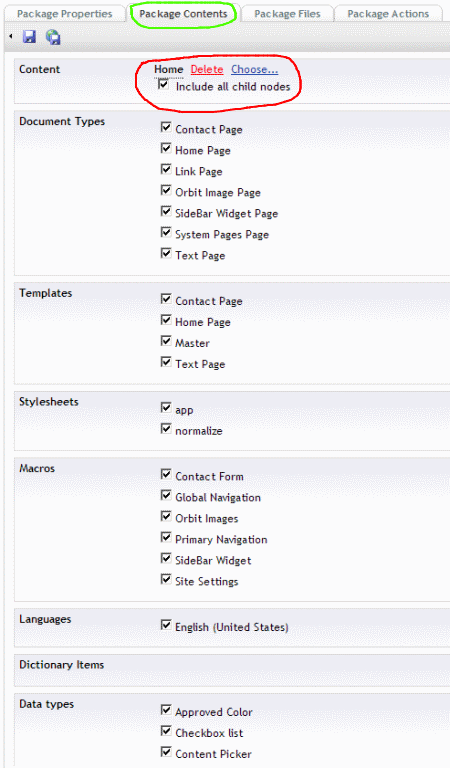
Step 3 - Select Package Contents
Click on the 'Package Contents' tab (circled in green). You use this this tab to select what parts of your site you want to be included in the Umbraco package. Since we want the whole site to be included, we select everything (i.e.tick all the boxes)
You should pay special attention to the 'Content' section (circled in red). Here you need to select the choose option and select the site's home page. Then tick 'include all child nodes'. This will ensure all the site's pages are exported into the package.
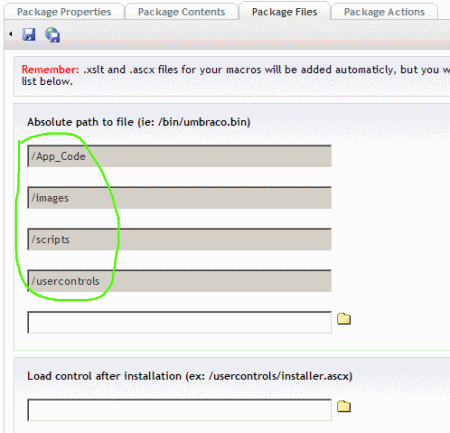
Step 4 - Select Package Files
Select the 'Package Files' tab (circled in green). This is where you tell Umbraco about any additional files you want to include in the package. This includes any assemblies, user controls, images and script files which are not included by default.
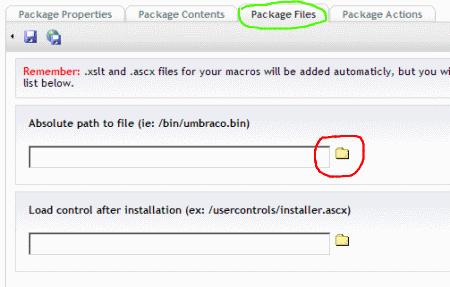
To add files / folders to include, select the folder icon (circled in red) and a dialog as below will be shown. Since we are packaging up the whole website, I find it best to use the 'include entire folder' options (circled in green).
Select a folder to include and this will be added to the form.
Repeat this process until all the folders you wish to add are included.
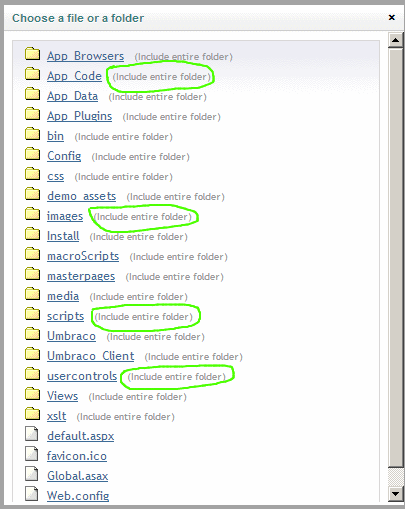
Below, I have added the typical folders you will need to include for an Umbraco website package
Step 6 - Select Package Actions
Select package actions (circled in green) if you want to run a task during the installation or uninstallation of your package. Typically this can be left empty.
You can now publish you package by selecting the publish option (circled in red)

Step 7 - Download Your Package
That's it, you've created your first Umbraco site package. To download the package zip file to your local machine select the download link (circled in green)
May